Land Rover Discovery 300TDi ES
The Disco was found listed on eBay in June 2009, and a few enquiries found me grabbing a lift to Hemel Hempstead with Tina to have a closer look. Most of a years MOT, very little rust, 101,000 miles with a fair bit of service history, and the right ES specification with EDC auto gearbox.
The EDC means an electronic control of the fuel injection on the diesel: whilst the manual and early auto's had a more reliable mechanical system, the electronics mean an increase in output, making the auto more powerful and quicker than the manual
vehicle. The icing on the cake was the best colour combination of Epsom green with grey leather. An hour spent crawling around the vehicle, followed by a quick haggle and some paperwork, saw me heading home in it, whilst Tina wound her way home to
Hampshire.

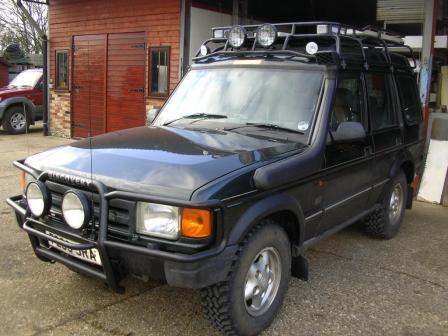
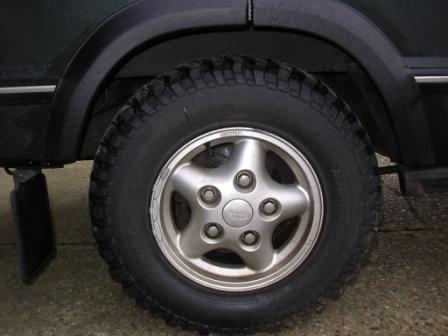
The picture above shows it as purchased, pretty standard except for the running boards and A bar. With the road tyres and running boards, no sign of any off-road abuse.
It was purchased to replace my 110 County, just seen parked behind. The intention with the 110 was to change the manual for an
auto, and I had purchased a doner Disco for this purpose. Unfortunately time passed without any time to get this sorted, plus the 110 was pretty imaculate, so too good for green laning, and at four times the cost of the Disco, too much money to be sitting around in a little used vehicle. So the Disco was a fast track to a purpose modified specialist vehicle - well that was the theory.
Meanwhile my mechanic went through the Disco without any but the usual problems, and my check through the service history pretty much verified the mileage as correct. The running boards came off and some JATE rings went on, and I fitted an EGR blanking kit, as well as a front set of Climairs to deflect the wind when the front windows are open.
I had previously purchased some Colway MT tyres on some Firestyle alloys off eBay from a guy in Hitchin, as you do, so these were fitted to the Disco. These were C-Trax MT 235/70 R16. I have a mistrust of remoulds and cheap tyres, but were quite impressed with these, especially in the snow (once warmed up a bit). The size was not a problem with the wheelarches, although I did tweak the rear of the rear arches a little, no cutting, just a little bending, just to give a bit more clearence. Downside was the soundtrack of a Jumbo jet landing on tarmac.
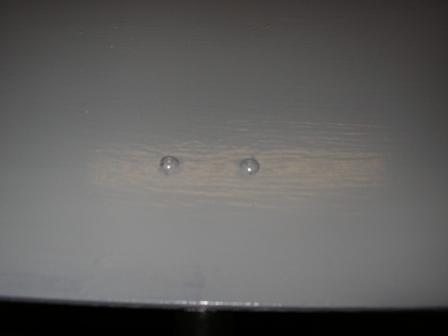
One of the main areas of concern with a Disco (or later classic Range Rover) is the boot floor. This can resemble a string vest, and
quietly rusts away under the boot carpet. Now I had already looked at this prior to purchase, but it needed sorting to prevent it going like the rest in time.
It was purchased to replace my 110 County, just seen parked behind. The intention with the 110 was to change the manual for an
auto, and I had purchased a doner Disco for this purpose. Unfortunately time passed without any time to get this sorted, plus the 110 was pretty imaculate, so too good for green laning, and at four times the cost of the Disco, too much money to be sitting around in a little used vehicle. So the Disco was a fast track to a purpose modified specialist vehicle - well that was the theory.
Meanwhile my mechanic went through the Disco without any but the usual problems, and my check through the service history pretty much verified the mileage as correct. The running boards came off and some JATE rings went on, and I fitted an EGR blanking kit, as well as a front set of Climairs to deflect the wind when the front windows are open.
I had previously purchased some Colway MT tyres on some Firestyle alloys off eBay from a guy in Hitchin, as you do, so these were fitted to the Disco. These were C-Trax MT 235/70 R16. I have a mistrust of remoulds and cheap tyres, but were quite impressed with these, especially in the snow (once warmed up a bit). The size was not a problem with the wheelarches, although I did tweak the rear of the rear arches a little, no cutting, just a little bending, just to give a bit more clearence. Downside was the soundtrack of a Jumbo jet landing on tarmac.
One of the main areas of concern with a Disco (or later classic Range Rover) is the boot floor. This can resemble a string vest, and
quietly rusts away under the boot carpet. Now I had already looked at this prior to purchase, but it needed sorting to prevent it going like the rest in time.
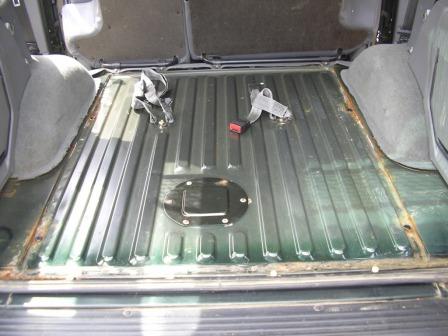
The corrosion occurs in the welded seams, which are covered with underseal underneath, but rust within, and eventually offer a view of the road from within the vehicle. Ironically, before the vehicles came with underseal, as was the case with the Range Rover, this was never a problem.
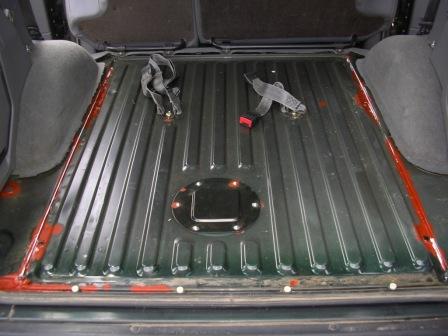
The left hand picture shows the boot floor, in this case still in excellent condition. The right hand shows the seams cleaned out and after a coat of Bondaprimer resin rust proofer. The underseal was also removed from the underside, and the rust treated here as well.
There followed a time of use and no further work, apart from in October I replaced the drivers window regulator, an almost guaranteed to fail item on any older Disco, and not a difficult job once the first time is out the way.
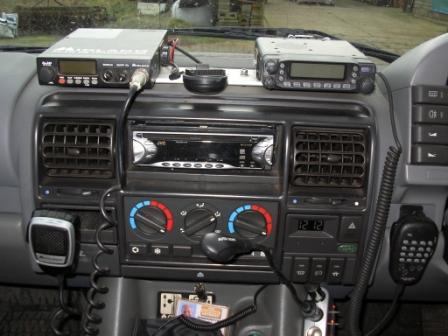
March 2010 saw the fitting of the radios to the dashboard. If you remove the standard radio and the rubber mat from the top centre of the dash, it provides a cable route within the dashboard. I fitted an aluminuim bar across the top of the dash in the centre, and fitted my CB, Amatuer Radio and Tom Tom (just the mount shown in the photo) to this bar. Supply cables (direct battery feed) were wired to here, and a mulitway switched cigar lighter socket also added to the transmission tunnel. Aerial cables went out the doors for now, one to the nearside bonnet mount for CB, the AR to a mag mount on the roof. The roof mount was something I was to regret - it was to be constantly hit by trees, knocked off and slid around, causing a scratched circle on the paintwork over time.
About this time I also spent some time cleaning up the wheel arches. The rears had some surface rust, with some welding required on one rear body mount, and the nearside is still in need of a small plate top of the inner wing near the seat belt mount, just by the door catch. The front wings showed the usual rusting around the fixings that hold the arch liners in place, these were not removed at this time, but just some primer applied. The rear arches were treated with Bondaprimer, Hammerite, and underseal.
Again a period of use up to October 2010. 'Use' consisted of a mixture of off-road and on road events. These ranged from driving a
doctor and medical staff in the snow in January 2010, off-road public rides for charity with Suffolk Land Rover Owners Club, charity event support for Norfolk & Suffolk 4x4 Response, event support for Cancer Research UK, and logistics support for Search and Rescue teams in Suffolk and Norfolk. In all cases the Disco performed admirably, with no breakdowns and without fault.
During this period I aquired a set of BFG MT in 245/75, part worn and having been off-roaded a bit, but at five for the cost of one new one, were not to be missed. Importantly these are 30.6" diameter, giving a 0.85 inch lift (235/85 remains my target size, and at 32" diameter will give a 1.55" lift on standard). Again, no more trimming of the arches were needed. Noise wise these got rid of the Jumbo soundtrack, and enabled a higher cruising speed at 80 without feeling it was all going to end in tears, and pretty much bought the speedo in line with the Sat Nav on MPH, ie: dead accurate.
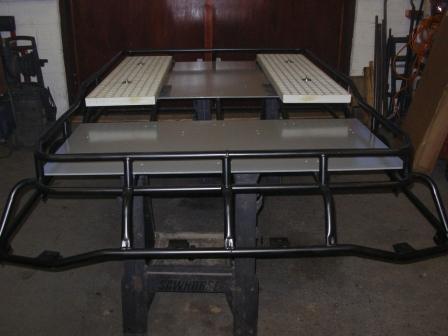
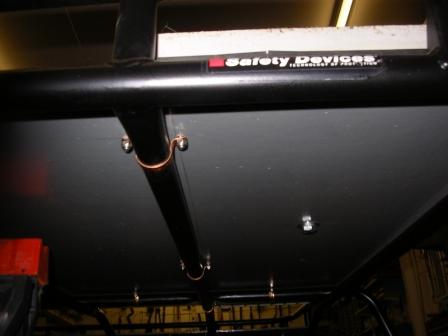
I had for several years lusted after a Safety Devices roof rack, these are the ultimate I think for the Disco. After several missed
opportunities on eBay eventually I found a good one in Aylesbury, and, having resigned myself to the cost of these things, got it for a bit less than my £500 maximum bid. The end of October saw me trundling across the country one dark night on a 300 mile trip to collect it. Once back it went in the workshop and had a spray coat of Satin Black Hammerite. I thought long and hard about what to do next, and decided on two sheets of lightweight exterior ply, fixed with copper pipe clips using stainless steel nuts and bolts.
The ply was painted with a wood primer, one coat each side, two coats on the edges. This was followed by grey floor paint, two coats either side, four coats on the edges. On the steel frame under the ply I stuck rubber draught proofing strip, to prevent the timber rattling on the frame. My sand ladders were fixed using captive bolts with wing nuts, mounted on some old Land Rover floor mats glued to the ply.
About this time I also spent some time cleaning up the wheel arches. The rears had some surface rust, with some welding required on one rear body mount, and the nearside is still in need of a small plate top of the inner wing near the seat belt mount, just by the door catch. The front wings showed the usual rusting around the fixings that hold the arch liners in place, these were not removed at this time, but just some primer applied. The rear arches were treated with Bondaprimer, Hammerite, and underseal.
Again a period of use up to October 2010. 'Use' consisted of a mixture of off-road and on road events. These ranged from driving a
doctor and medical staff in the snow in January 2010, off-road public rides for charity with Suffolk Land Rover Owners Club, charity event support for Norfolk & Suffolk 4x4 Response, event support for Cancer Research UK, and logistics support for Search and Rescue teams in Suffolk and Norfolk. In all cases the Disco performed admirably, with no breakdowns and without fault.
During this period I aquired a set of BFG MT in 245/75, part worn and having been off-roaded a bit, but at five for the cost of one new one, were not to be missed. Importantly these are 30.6" diameter, giving a 0.85 inch lift (235/85 remains my target size, and at 32" diameter will give a 1.55" lift on standard). Again, no more trimming of the arches were needed. Noise wise these got rid of the Jumbo soundtrack, and enabled a higher cruising speed at 80 without feeling it was all going to end in tears, and pretty much bought the speedo in line with the Sat Nav on MPH, ie: dead accurate.
I had for several years lusted after a Safety Devices roof rack, these are the ultimate I think for the Disco. After several missed
opportunities on eBay eventually I found a good one in Aylesbury, and, having resigned myself to the cost of these things, got it for a bit less than my £500 maximum bid. The end of October saw me trundling across the country one dark night on a 300 mile trip to collect it. Once back it went in the workshop and had a spray coat of Satin Black Hammerite. I thought long and hard about what to do next, and decided on two sheets of lightweight exterior ply, fixed with copper pipe clips using stainless steel nuts and bolts.
The ply was painted with a wood primer, one coat each side, two coats on the edges. This was followed by grey floor paint, two coats either side, four coats on the edges. On the steel frame under the ply I stuck rubber draught proofing strip, to prevent the timber rattling on the frame. My sand ladders were fixed using captive bolts with wing nuts, mounted on some old Land Rover floor mats glued to the ply.

The heads of the bolts were given a coat of floor paint on the top, as were any holes cut in the floor for cables, etc.
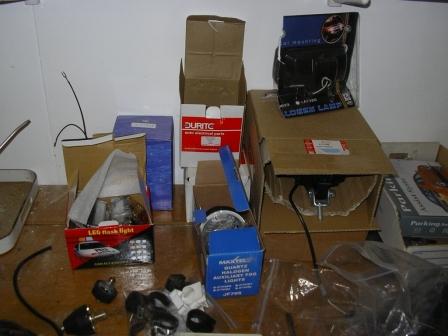
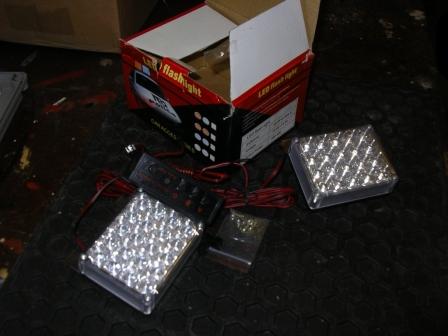
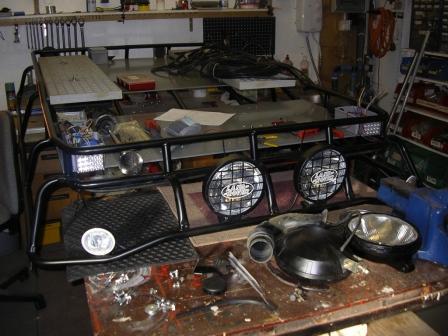
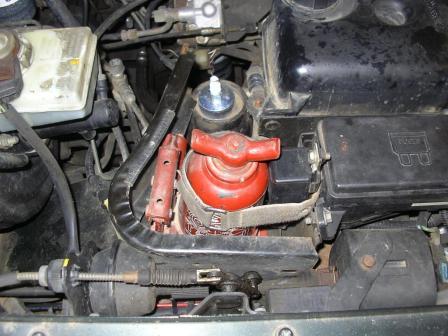
Meanwhile more shopping was underway. Some Land Rover rally lights were bought from a LR dealer for half price on eBay, and other bits and pieces were purchased or dug out from past acquisitions. I had some flashing led hazards, a spare Bosch battery from my 110, and some Angel Eye spots. A switch panel was purchased from a marine chandlers, although this was not used in the final plan. Some small 12V relay pcb's were sourced, and I dug out the marine fog horn that had come with the 110.
Meanwhile more shopping was underway. Some Land Rover rally lights were bought from a LR dealer for half price on eBay, and other bits and pieces were purchased or dug out from past acquisitions. I had some flashing led hazards, a spare Bosch battery from my 110, and some Angel Eye spots. A switch panel was purchased from a marine chandlers, although this was not used in the final plan. Some small 12V relay pcb's were sourced, and I dug out the marine fog horn that had come with the 110.

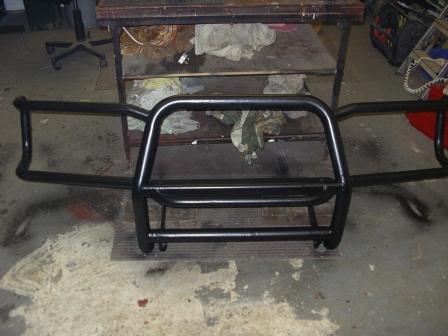
Meanwhile I had rescued an old Bull Bar that had been laying outside for some years. It had been fitted to an earlier Disco, but had
almost been pulled off on an overenthuastic KERR recovery using the attached tow points (the moral here being only recover with JATE rings, and you can fit them with a bull bar, it just needs perserverance!). Much welding later and it was pretty much back to normal. Many coats of hammerite, much rubbing down, and several final spray coats again in Hammerite satin black saw
it at an acceptable level. The good thing about a working Land Rover is that 'good enough' is fine for everything, much easier than a classic car!
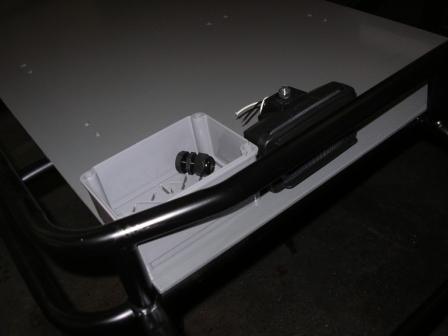
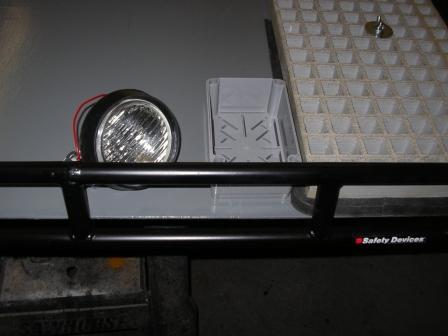
Whilst the roof rack was on some saw horses, assembly of the desired components continued. I had some waterproof boxes aquired a few years ago from work, and three were fitted at required positions. The rear joint box was adjacent the rear worklight, and also housed the control unit for the rear pair of LED hazards. These hazards are selectible in operation by momentary buttons on the control unit, a link being soldered across the desired button switch to make them permantly work in the desired fashion. From here a 3 core was wired to the O/S front JB, with a 7 core link to the N/S front JB. The two front joint boxes covered the Land Rover spots, Angel Eye side and spots, left and right side spot lights, hazard flashers front and side,

Meanwhile, December arrived, as did a Heavy Duty Standard Height Pro Comp suspension kit from Mail Order 4x4. A load of research on springs had proved pretty much fruitless. Land Rover don't publish much on lengths or spring rates, and HD factory springs are not available.
Bearmach seemed the most reputable for the price, but I found their technical information in their catalogue and on the web to have serious errors, something like the spring length for a 2" lift being shorter than that for a standard HD. Mail Order 4x4 had the kit at a good price, but no detailed specification. Phone calls to Bearmach and MO 4x4 technical departments proved fruitless. In the end I just bought the kit blind, it sounded right, but no information to back it up. I was after a slight body lift, but not the 2" I had added to a previous Disco - that had wreaked the handling and made it totally unstable on the road.
So off it went to my mechanic for the new spring and shocks to be fitted. I also had Cat and main silencer blanks I had bought for the 110, these are nearly identical to the Disco ones, so these were to be fitted as well. A well due service (only 6,500 miles since purchased, but 16 months had passed) and a couple of maintenance jobs completed the list. It came back 20mm higher at the front and 25mm higher at the rear, with much firmer suspension and little roll - pretty much spot on what I wanted - a slight lift
with improved handling - not driven it that much yet, but early signs are encourouging. Not so sure about the exhaust, much louder now - we shall have to see if there seems to be any performance gain. Removing the Cat is definately a good thing, but not sure about the main silencer. Trouble is it really needs a sports silencer to replace the rear box, but at £160 it is an expensive experiment. Will see how it goes, might play with it a bit in the warmer weather- I have a carbon straight through silencer off my old
SV650!
Having pretty much finished the roof rack, attention moved to the snorkle. Three reasons for fitting this: one is the main reason of
protection the engine when wading, two is surprisingly the air filter was found to be water damaged despite never having ventured into any water of consequence (it just proves normal deep water road spray gets in), and three it will provide a route for the roof wiring. Had previously purchased a copy of the Safari Snorkel and saved myself about £40 -false economy - it did not fit as well as the real thing, but ended up fine after a bit of twaeking. Hate the bit where you have to drill out the wing, but at least I bought the correct sized cutters a few years ago, and it is a lot easier the third time!
Expect a lot of fiddling though, the instructions forget to mention many things, the alarm switch mounted in the way being one of
them.
Getting the wheel arch liner off is always a fiddle, in fact almost impossible, and expect the fixing holes to disintegrate on the inner wing.
Once out of the way I made up some aluminium strips about 4" wide and pop rivited these along the seam of the wheel arch liner, having removed and treated the rust first. A bit fiddly and not a neat job, it suffices to repair and treat the rust, and give a firm fixing for when the liner goes back on - pop rivits were used for this.
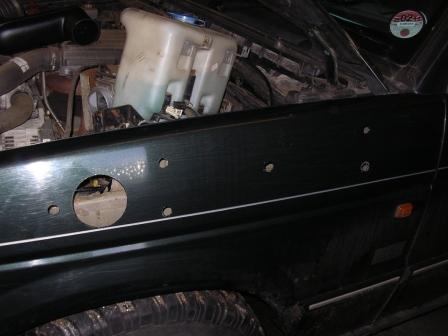
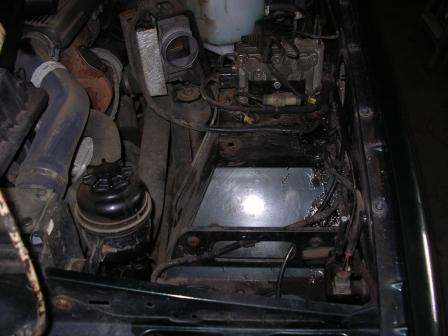
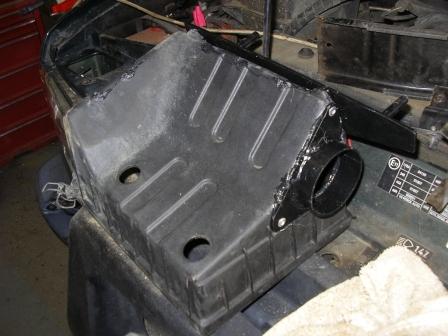
The washer bottle was moved out of the way, and the air filter box removed for the modifications, note this must be made watertight, including the drain holes. The bracket holding the air intake hose was adjusted to line up with the revised position of the air filter box, literally used a crowbar for this.

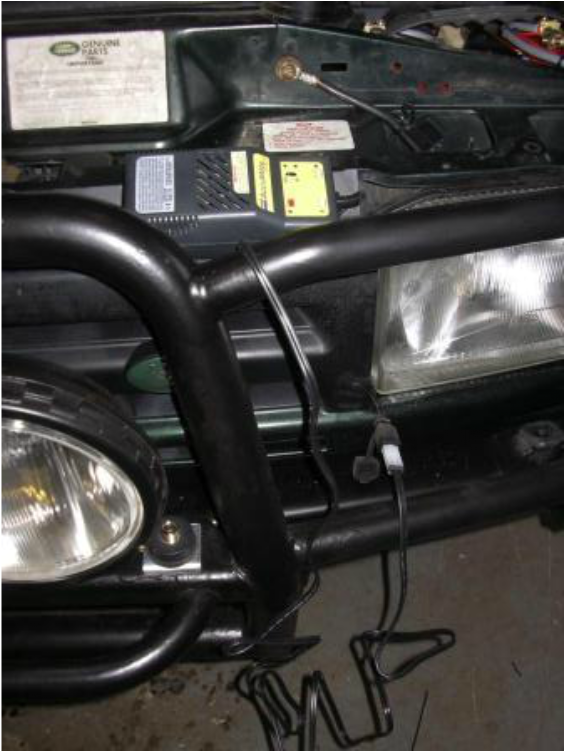
At the same time the front bumper, grille and lights were removed. First job was to treat any rust found, particularely the N/S
front body mount. Next was to remove the centre skirt from the bumper, and cut off the skirt either side. Remember to unplug the fog lights and the headlight washer tube before removing the bumper - I didn't!
The other area with corrosion was the N/S side where the overider corner bolts onto the body, this needed a plate fixing on. Whilst off both overider corner fixings were removed and brackets reshaped, painted, and fitted with new bolts. The bumper was also sprayed satin black. Whilst here, the N/S battery tray was refurbished and made ready for the second battery.
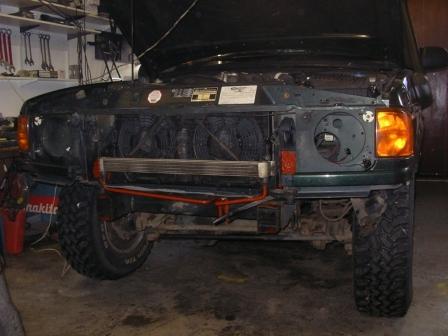
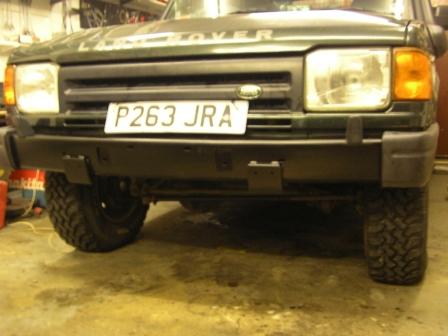
Front bumper now loosly bolted on, I had purchased some longer HT bolts for this.
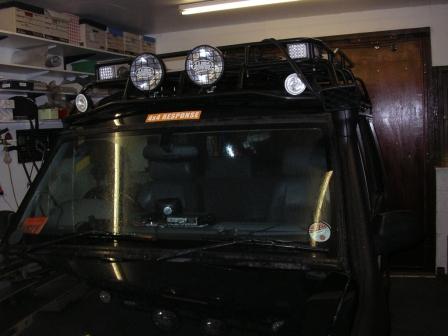
Here we have the roof rack on the vehicle, some new screws were required, I used a mixture of the original allen screws plus some pozidrive to make it more secure, or less easy to steal! The snorkle is fitted, but the cables are still on the roof to be bought down. From these roof joint boxes a 7 core and a 4 core were run back to the drivers seat box. The route was via a 20mm conduit run alongside the snorkel, into the underbonnet ventilation chamber, into the nearside wing void (prior to re-fitting the wing
liner), then across the bulkhead under the bonnet, then into the drivers footwell, and under the carpet to the drivers seatbox.
liner), then across the bulkhead under the bonnet, then into the drivers footwell, and under the carpet to the drivers seatbox.
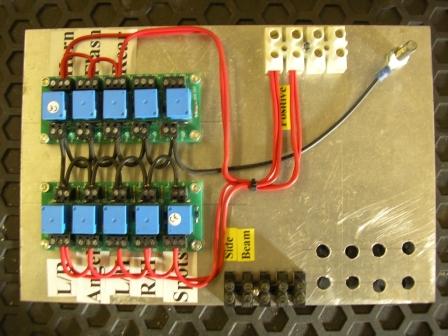
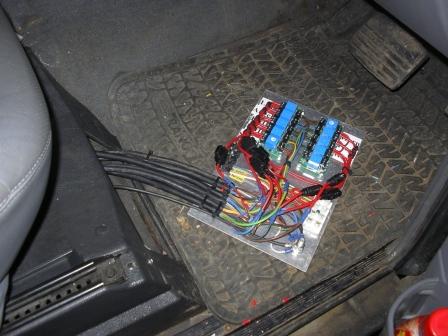
Meanwhile I had built the control plate. This consisted of 8 relays, one for each of the roof equipment functions, and one for the front bull bar spots. This would be the main control point and the junction of all cables: the 7 and 4 cores from the roof, the 4 core from the battery, the 3 cores from the front lights, and the 8 and 7 cores from the switch bank.
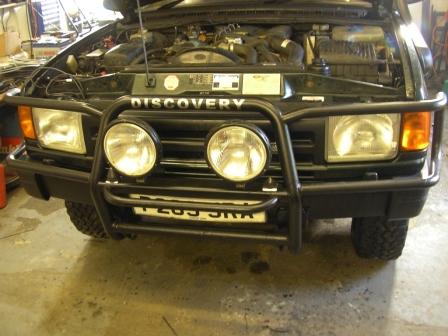
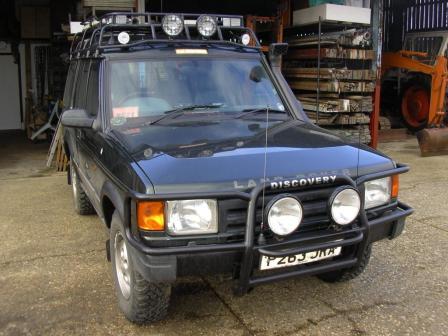
Whilst these cables were being installed, the CB and AR aerials were rewired to the front of the vehicle, where two mounts had been fitted to the bull bar. In this picture the bull bar is fitted, as are JATE rings, numberplate and spotlights. Some thought was given to the crash cans on the bumper, but these are not accomodated with this set-up.
Whilst these cables were being installed, the CB and AR aerials were rewired to the front of the vehicle, where two mounts had been fitted to the bull bar. In this picture the bull bar is fitted, as are JATE rings, numberplate and spotlights. Some thought was given to the crash cans on the bumper, but these are not accomodated with this set-up.

It was originally planned to site the switches on the roof centre console, but on closer evaluation it was thought much easier to site
these alongside the centre console on the drivers side. Suitable illuminated switches were sourced very cheaply off eBay, and a length of aluminuim angle was earmarked for the plate. Labels were printed on a brother label maker, the switches fitted, and it all loomed up. The operation is Horn and Hazards permantly live, Angel sidelights and front spot sidelights unswitched off the sidelight feed, as is the rear worklight, with all other lights only operable when main beam is selected. The thinking is that if these spots and floods are used 'on road', then all will be extinguished by dipping the headlights. The backlights on the switches only illuminate when the lights are on, irrespective of switch position, to give a true indacation.
The original fit radio was not working, and had a CD changer under the drivers seat. This was all removed, and a spare JVC sterio fitted to the dash. Removing the CD changer allowed the drivers seat box to house the control plate, shown all connected in the above picture. In line fuses were again sourced off eBay, and one is closely protecting each circuit.
All switch functions operate a relay which switches the load, all extra load being supplied by a direct feed from the battery. Cables are sized according to load as far as practicable, the total lighting load being 41 amps, plus 17 amps for the marine horn.

The final works were to fit the second battery. The Disco has always been slow to start, and the extra load would present an
additional problem, maybe even with the engine running.
additional problem, maybe even with the engine running.
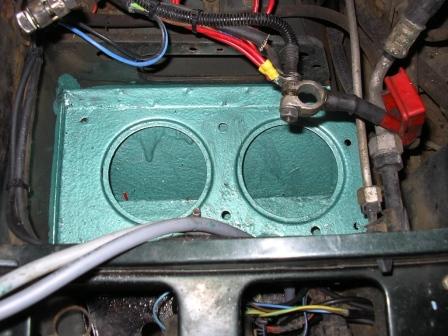
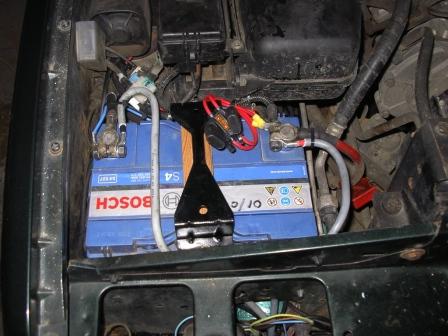
The previous owner had fitted an Optima battery, which was handy as there was insufficient space on the nearside for a full size
battery. The solution was to fit the Optima to the nearside, and the Bosch full size one from my 110 to the offside. Both areas were rustproofed prior to fitting the batteries, the main battery tray being a prime area for corrosion. The nearside tray is already fitted, I just needed to buy the second battery clamp from - you guessed it! Note that both batteries are securely fixed in position, the nearside one on a wooden plinth to ensure the cable passing underneath does not get trapped. Note the parallel inline
40A fuses on the feed cable to the additional equipment.
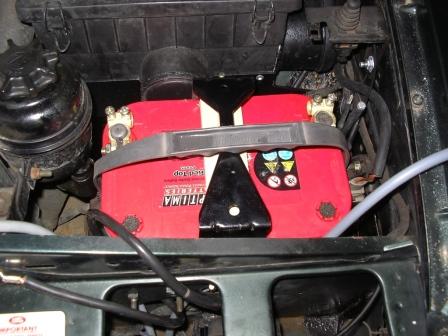
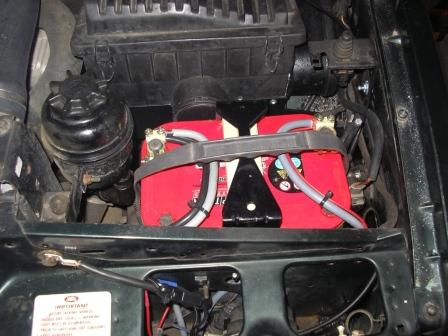
Optima battery fitted on the nearside, wired up in the second picture. 6mm DS PVC singles were used to link the batteries, both neg and positive to ensure a good connection, plus a 6mm earth connection. Much thought was given to the batteries in parellel, and a split charge system was considered. However, it is not intended to run any load without the engine running, the second battery just ensuring starting is easier and providing a deeper reserve of power if the alternator became stretched. Consideration was given to balance between the batteries, these are both of simular outputs and age, and most importantly are both sealed. This set-up will be monitored, but there do not seem to be any problems regarding inbalance initially. A plug in socket for a battery charger was also added here, enabling the batteries to be charged without opening the bonnet.
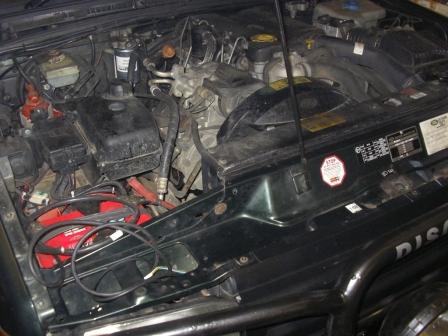
Finally the jack and wheel chock fitted nicely on top of the offside wing, the mounting bracket being moved here from the N/S battery tray.
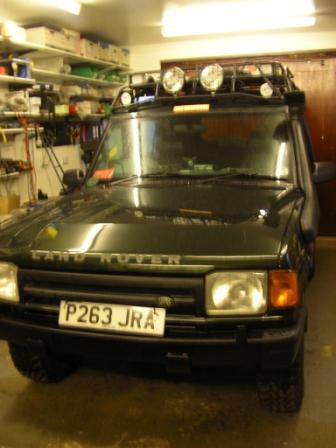
And so the finished article, needing a clean, but pretty much complete - for now............

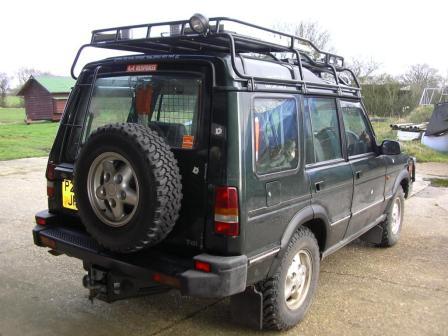
The rear ladder came with the roof rack, and fits quite nicely.

The wheel arches were a final addition, fitted quite easily - mainly pop rivited on to the wheel arch, but glued to the doors. I did the
'Camel cut' (2" off the bottom of the rear wing and cut two thirds of the way vertically to the side trim) to the rear of the rear arches, and slew the liner away from the wheel a little. There was some fettling done, again these are aftermarket arches, not original equipment, so a jigsaw cut here and there just to fit the vehicle better. I will try with a single ramp on one wheel to check clearence under full deflection, but I am after being able to accomodate the 85 profile without further work.
'Camel cut' (2" off the bottom of the rear wing and cut two thirds of the way vertically to the side trim) to the rear of the rear arches, and slew the liner away from the wheel a little. There was some fettling done, again these are aftermarket arches, not original equipment, so a jigsaw cut here and there just to fit the vehicle better. I will try with a single ramp on one wheel to check clearence under full deflection, but I am after being able to accomodate the 85 profile without further work.